Have you ever met this situation: "Your PC ran into a problem that it couldn't handle, and the disk usage is nearly 100 percent"
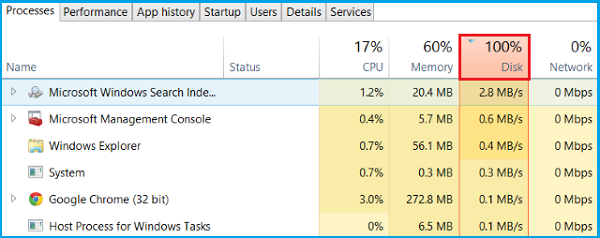
Just like the picture shows, your windows 10 is at 100% usage. To fix 100% disk usage issue, you must follow the procedure below.
Check the Task Manager to find out the cause
First, we're going to open the task manager and take a look at our disk usages. So as you can see if it is now 100% and is slowing our computer down.
- Type “task manager” in the Windows search bar and select Task Manager:
- In the Processes tab, look at the "disk" process to see what is causing your hard disk 100% usage.
Fix Windows 10 100% disk usage problem
Here are a few repair methods that have helped other users fix their Windows 10 100% disk usage problem. Just simply follow the operation procedures to resolve Windows 10 100% disk usage problem.
Method One. Check Anti-virus Software
Usually, the virus could be the main cause for loss of situations and 100% disk usage is no exception. Your security software should be able to deal with this, whether it's a free app or a paid suite.
At the very least, tools such as BitDefender, Avast, and AVG anti-virus should be able to scan your system drive and detect any problems, although with a heavy load on your drive already this may take a while.
Method Two. Disable Windows Search
There are two ways to disable Windows Search: temporarily disable Windows Search, and permanently disable Windows Search.
Temporarily disable Windows Search:
- Right-clicking the Start button
- Selecting Command Prompt (Admin)
- Enter the following: net.exe stop "Windows search"
Permanently disable Windows Search:
Step 1. Press Windows logo key + R at the same time, and type in services.msc.
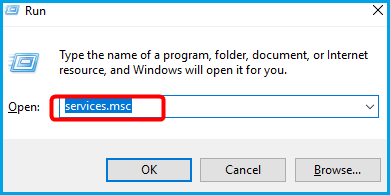
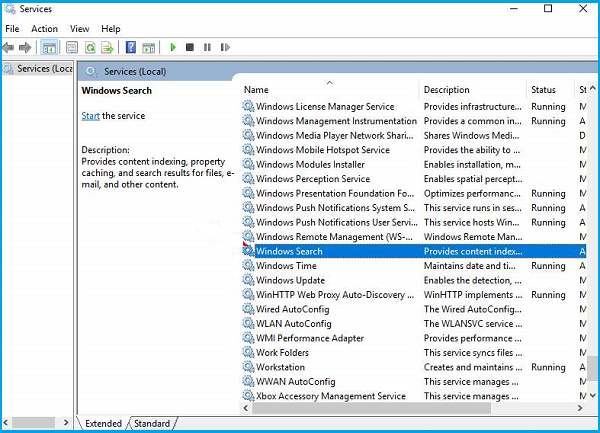
Step 2. Locate Windows Search option, double-click it to enter its Properties window.
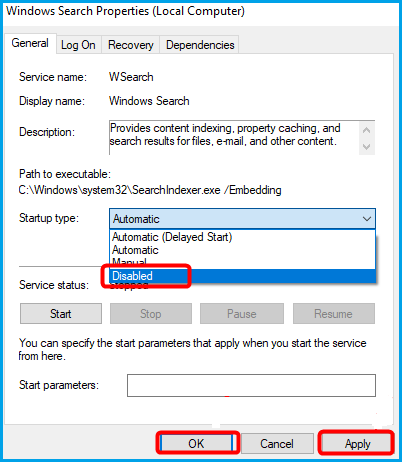
Step 3. Change the Startup type to Disabled. Then click Apply and OK to save your change.
Method Three. Clear up the Running Memory
Clear up running memory appropriately will low disk usage. Follow the simple steps to solve 100% disk usage problem. First, download the free clear up tool - EaseUS partition magic software, then follow the steps.
Step 1. Launch EaseUS free partition tool and click "Cleanup and Optimization". Then choose "Junk File Cleanup".
Step 2. Click "Analyze" to let the tool find trash that takes up space on your PC.
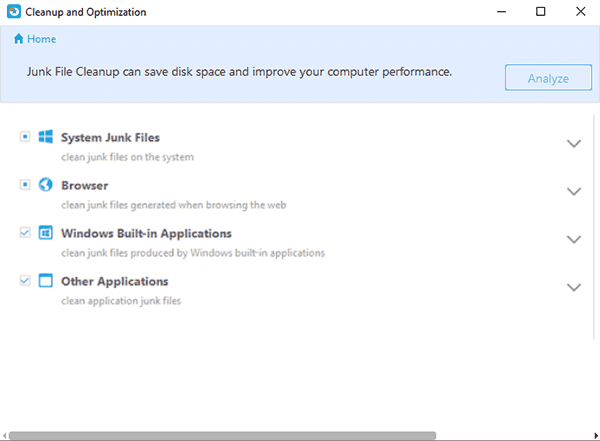
Step 3. Check and choose the trash you want to clear up and then click "Clean up".
Method Four. Reset Virtual Memory
Virtual memory is a combination of RAM and a portion of your hard drive. "When the RAM isn't enough to perform a task, Windows will temporarily store files in virtual memory, then swap them back to RAM when required."
Steps to reset virtual memory:
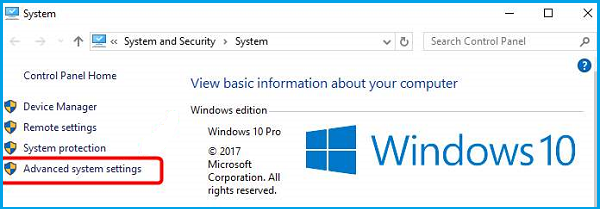
Step 1. Press Windows key + Pause/ Break key at the same time. Then choose Advanced System Settings on the left panel.
Step 2. Go to the Advanced tab, then click Settings.
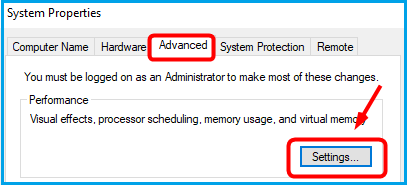
Step 3. Go to the Advanced tab again, and choose Change in the Virtual memory section.

Step 4. Make sure that the Automatically manage paging file size for all drives check box is NOT ticked.
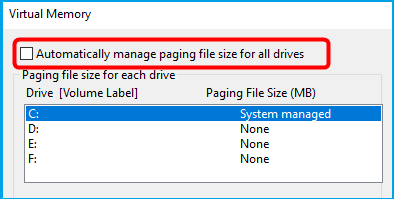
Step 5. Select your windows drive (the hard drive or partition that has Windows installed on it – usually C:), and enter an Initial size and Maximum size for your virtual memory:
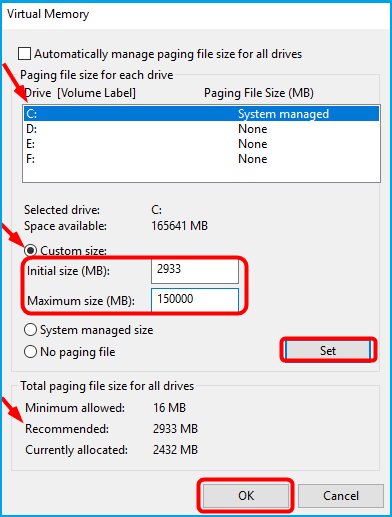
- Initial size: This value varies, depending on your computer. If you're not sure what value to use, just enter whatever the number is in the Recommended category.
- Maximum size: Don't set this value too high. It should be about 1.5 times the size of your physical RAM. e.g. A PC with 4 GB (4096 MB) of RAM should have no more than about 6,144 MB virtual memory (4096 MB x 1.5).
Once you've entered your virtual memory values, click Set, then click OK to continue.
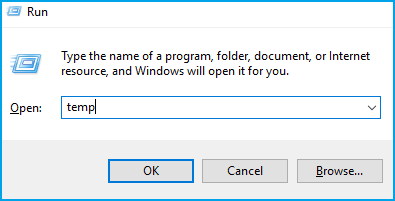
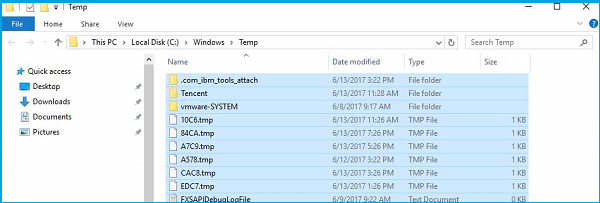
Step 6. Clear all your computer's 'temp' files. On your keyboard, press Windows key and R at the same time, then in the Run form, type temp and hit Enter. This will invoke Windows Explorer with your Temp folder open, showing you all the temp files on your computer.
Step 7. Select all the files in the Temp folder and delete them.
Method Five. Upgrade hard drive
The hard drive that develops too many bad sectors on it would largely send your computer into a loop with a high disk usage.
Or, your computer hard drive might be too old to work properly, even there is plenty unused space available, still your computer functions like a turtle and constantly reports 100% disk usage.
It's time to upgrade the hard drive. The EaseUS Partition Master introduced in Method Three can help you replace the hard drive in question with a new one without taking time to reinstall Windows 10.
This is how you start:
Step 1. Connect the alternative hard disk to the computer (If it is a new hard disk, please initialize it to MBR disk.).
Step 2. Install and launch EaseUS Partition Master.
Step 3. Select Wizard -> Clone disk wizard from the main menu.
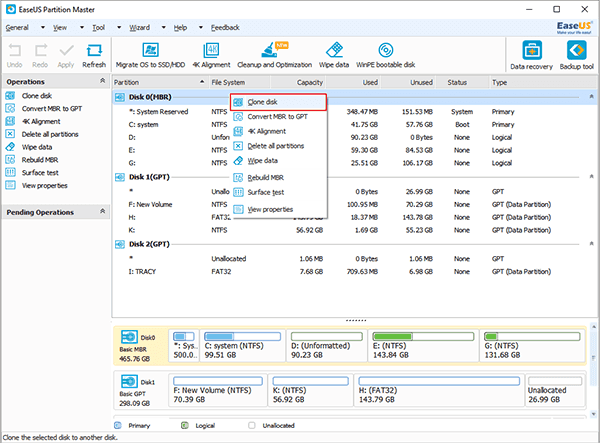
Step 4. Choose the destination disk - i.e. Disk 2, and then click Next.
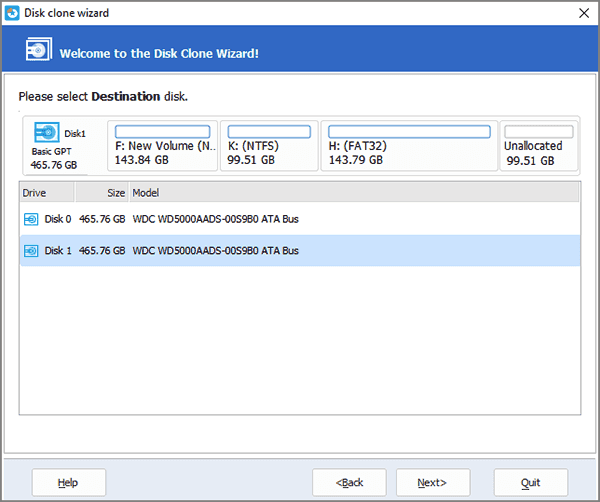
* If there are some partitions on the destination disk, please confirm to delete the partitions and data on the destination disk. Click Next.
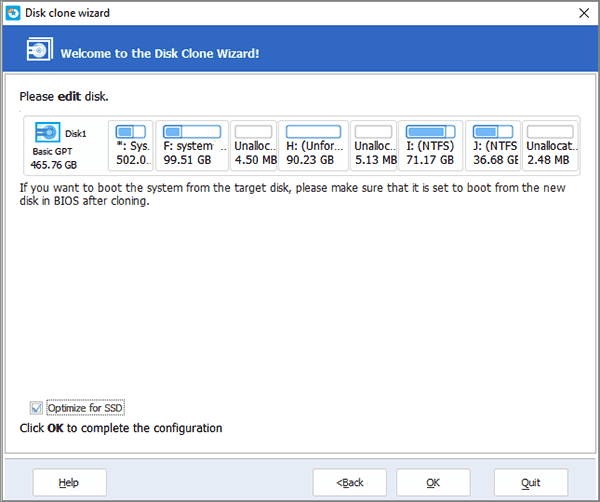
Step 5. Resize partitions on the destination disk. Position the mouse pointer on the left or right partition handle. The mouse pointer changes to a double-headed arrow and please drag the handle to the partition size you want. Click OK.
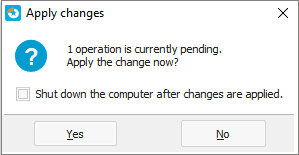
Step 6. To preview the result on the left panel Pending Operations. If it is right, then click Apply. Tick Shut down the computer after changes are applied.
Step 7. Please replace the source disk with destination disk and then boot the computer.
Is the 100% disk usage issue slowing down your Windows 8.x or Windows 10 computer? Have any of these methods fixed the problem? Tell me and let's see if we can get it resolved.
0 comments:
Post a Comment